Here are some custom clock face making idea’s I’d like to share with you. Making a custom made clock face, or dial, can be fun. It’s a much appreciated gift, especially when specifically made with someone in mind. An easy way to customize is to use small, fairly thin objects, glued to a blank clock dial of your design, to indicate the hours to show the passing of time.
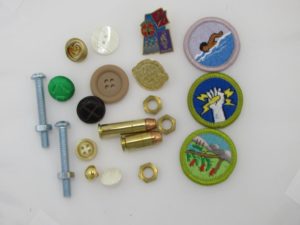
For example, buttons, guitar picks, stamps, bullets, fabric samples, embroidered badges, pins, medals, coins, keys, family and pet photo’s, matchbooks (am I showing my age?), refrigerator magnets, Casino chips, dice or playing cards, cookie cutters, seeds like beans or corn, dried flowers, soda and beer bottle caps, thin stones like river rocks, seashells, rope knots, fishing lures, beads, ticket stubs, and Boy Scout Merit badges. The list is virtually endless. Let me know anything I may have missed.
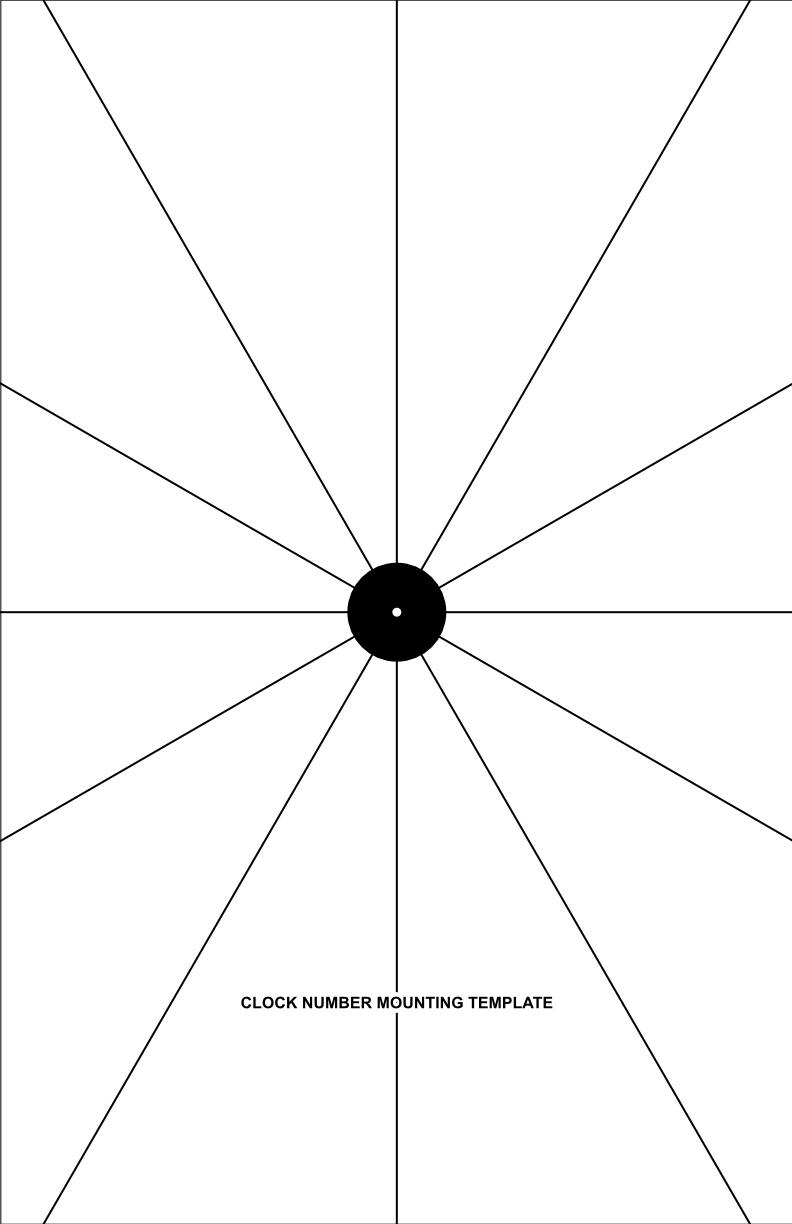
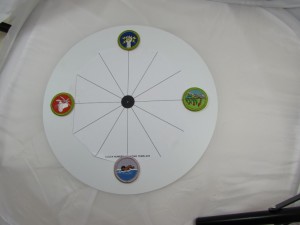
If you really want to keep it simple, just glue these “indicators” at the 12, 3, 6, and 9, positions on your blank clock face. You can also go all the way around and use 12 “indicators” indicating every hour. Please reference the 8-1/2 by 11 inch number template we offer on our web site. Just print it out and use to layout your custom clock dial. It can really make laying out your clock face a lot easier.
Make sure that the “indicators” that you have chosen are not more than 1/4 inch thick, and thinner is better. Think about if you want the minute hand to be just inside of, or actually over your “indicators”. It’s your choice. If you wish to have the minute hand actually going over the “indicator”, then get a measurement of how thick it is. Add the thickness of your indicators to the thickness of your clock dial to determine the right movement shaft length.
The hand shaft on the clock motor you choose may need some extra length, depending on your “indicator” thickness. You need a hand shaft length long enough to go through the clock dial and go above the “indicators”. This thickness, with about an extra 1/8” to put the brass hex nut on, is how long the threaded part of the movement hand shaft should be.
My favorite adhesive to use for a project like this is a 5 minute 2 part epoxy. It’s normally clear and will hold just about anything, once it has dried in five minutes or so. Just be sure of where you want everything as once dried, that’s it!
Since our clock hands are metal, they can be slightly bent if needed. Always best to bend near the mounting hub, and be gentle. Needle nosed pliers can be helpful and so can a small piece of cloth to prevent scratching the clock hands. It’s also perfectly normal to trim a pair of clock hands to a shorter length if you would like. Just use wire trimmers or Shop Scissors and you will be the only one who knows you did it..
![]()
Just think of a family member or friend and it probably not hard to think of a “theme” that would make a great clock. My Uncle collected beer bottles and I made him a clock using 12 beer bottle caps. It became one of his proudest possessions. Same with the Grandchild photo clock we made for my Mom. It’s an easy way to make someone happy.
Hopefully this has gotten you thinking about some very clever customized clock dials, and how you can put a smile on the faces of some friends and family.